Many businesses want to migrate their online store from another platform to BigCommerce, but they’re not sure of what that entails. BigCommerce offers a service that helps migrate certain aspects of client sites to their platform. To get a more complete migration, you may want to consider moving yourself or with the help of a BigCommerce SEO expert.
If you’re looking for a comprehensive checklist that reviews every aspect of the migration, read on!
Pre-Migration Preparation
Preparing before you migrate to a new platform is crucial, since it helps you avoid surprises and last minute moments of panic.
Collecting Data
The most important way you can prepare to get on BigCommerce is by collecting all the data on your current site before the new site has launched. A full crawl using software like Screaming Frog will export the HTML pages of your site in a single spreadsheet. You will need to organize your exported sheet manually into a structure that makes sense to you for ease of use, as Screaming Frog does not use structure or pagerank to arrange URLs.
Using the data collected by Screaming Frog’s advanced xpath parameters, create a sitemap for your old domain focusing on the most relevant, active pages of your site. You should also benchmark the old site’s performance and page load speed using tools like Pingdom.
Prepare Your Redirect Strategy
While redirecting pages isn’t actionable until you have your new URLs and sitemap, you can ensure that your original Screaming Frog spreadsheet has all the relevant pages that will be included in your new site. Include all the pages from the old site that you plan to include on the new site in your spreadsheet, so it’s ready when the time comes for 301 redirects.
You now need to conduct another crawl of your in progress site and export an additional spreadsheet with all of the new planned URLs.
Cross-reference your two sheets and match up the URLs for the old and new pages to ensure they redirect to the correct place. A simple way to do this is to search each sheet for a unique value that would only appear in those two URLs, such as a SKU or product number.
After all the pages from the old site have a URL to redirect to, check the spreadsheets that lists all the pages that have inbound links, that are indexed, and that have received traffic to make sure all of these URLs are also included in the redirect strategy.
Prepare for Site Restructure
Since BigCommerce has a number of themes to choose from, you may want to check your site structure against their templates to find the one most similar to your current site. Matching the two structures will simplify migration for site architecture, content, and design. Keeping your URL structure the same can even minimize the loss of page value and make the creation of a redirect strategy easier. If you’re working with a BigCommerce Expert, you will want to make sure they consider your existing site navigation in their design process.
The Migrating Process
When it’s finally time to begin your transition process, there are several steps to undertake, including:
- Building your new website in the BigCommerce staging site.
- Creating and implementing your redirect strategy.
- Preparing a Robots.txt file.
- Creating HTML and XML sitemaps.
Build the New Site
BigCommerce provides a staging space, also known as a dev site or sandbox store, where you can create your new site piece by piece before going live. Generally, you want to build your new site from the most important URLs to the least important URLs in this order:
- Import your Product page content and QA it.
- Move your Category page content and QA it.
- Import your other Canonical content and QA it as well.
As you transition these pages, include all the metadata and content on the old pages, such as:
- Headers
- Title Tags
- Meta Descriptions
- SKUs
- Product IDs
- MFG Part Numbers
You can preview your pages on the storefront and QA them by comparing them to the data you gathered on your Screaming Frog crawl spreadsheet of the old site.
Implement Your Redirect Strategy
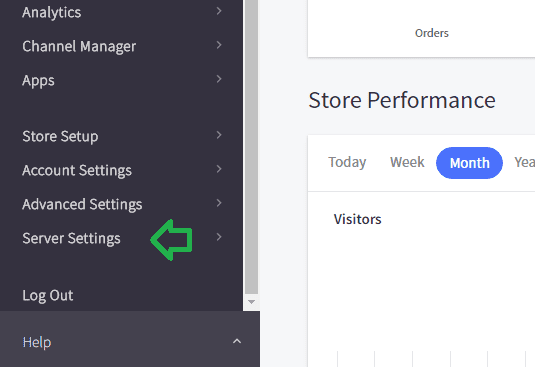
- In the BigCommerce admin, go to Server Settings › 301 redirects.

- Click Add Redirect.

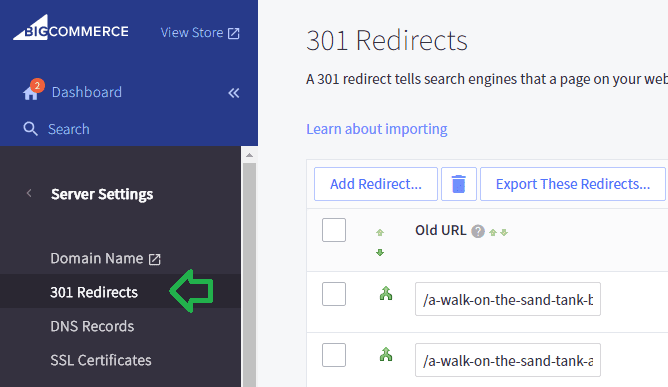
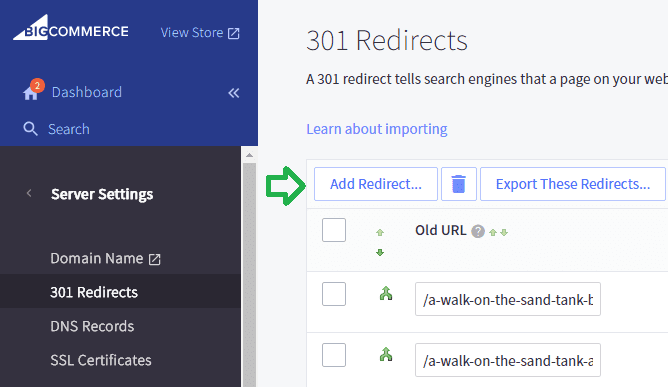
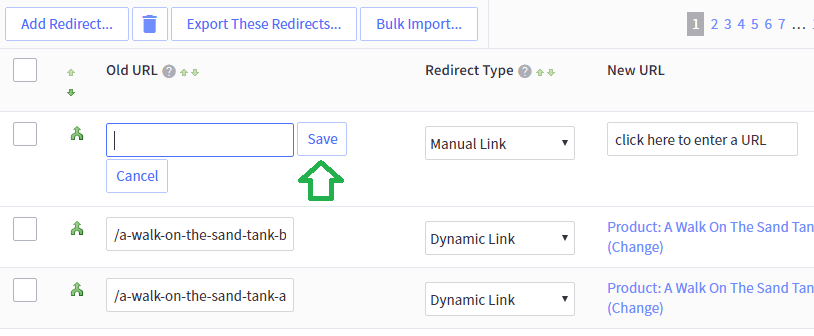
- In the field that appears under Old URL, type the URL of the page preceded by a /.

- Click Save when finished.

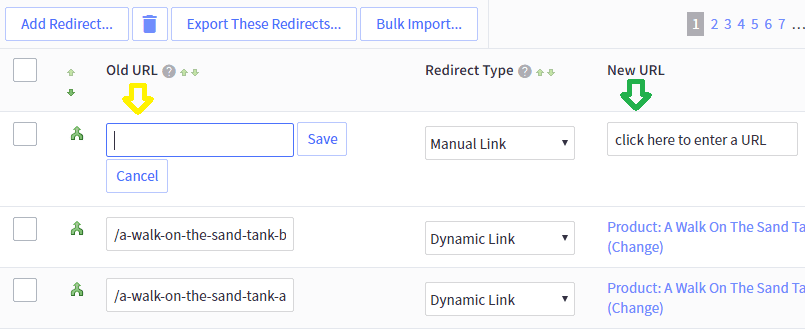
- Select whether you want your redirect to be manual or dynamic.

When you choose to redirect pages manually, you enter the new URL for each page. If you change the URL again, you will need to update the 301 redirect. For dynamic redirects, update URLs through the category, product, brand, blog entry, or webpage that the customer should be redirected to. If the URL of the page changes later, the 301 redirect updates automatically.
- For manual redirects, enter the new URL in the empty field under New URL, preceded by a /.
- For dynamic redirects, click the link under New URL.
- Choose a product, category, brand, or web page.
- In the pop-up, select the type of page you are linking to and then select the page from the list provided.
Create a Robots.txt File
Your Robots.txt file is there to direct search engine crawlers onto pages you want them to index. It also indicates the path they should navigate through your site, usually following the XML sitemap as follows:
- User-agent: *
- Disallow:
- Sitemap: http://www.example.com/sitemap.xml
There are certain parts of the site that should be barred to crawlers, like pages with private information that are part of the checkout process or account creation. You also want to block any pages that may cause duplicate content issues with the old site.
For instance, if you must keep certain old pages live for record keeping purposes, you don’t want anything crawling those same pages on the new site until they’re gone from the old site. As you transition to your new site, you may have to modify your files several times.
Prepare an HTML and XML Sitemap
BigCommerce will automatically generate an HTML sitemap that shows the structure of your new site. The HTML sitemap is used by customers and search engines alike to learn about the layout of your site, so be sure to include a link to it in your footer.
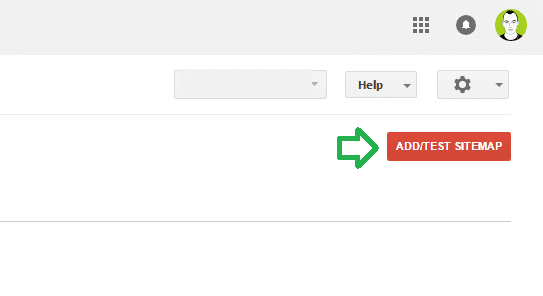
BigCommerce will also generate an XML sitemap that, ideally, only contains HTML pages. You should test it for broken links before your site goes live. You can test it with Google Webmaster Tools which will help you identify errors. Once your XML sitemap has been through QA, submit it to Google, Bing, and other search engines.
If you make any major changes to your store or site after submitting your XML sitemap, like adding more products and categories, you need to create a new sitemap and resubmit it.
Post Migration Checks and Fixes
After your new site is completed, you still need to run checks and fix issues such as broken links and duplicate content.
To Fix Broken Links
Run the site in Screaming Frog again to check for internal and external broken links, 302 redirects, 404 errors, or other issues you may not have thought of. Ensure all 302 redirect are transformed into valid 301 redirects, fix broken links, and redirect 404s to the homepage of your site.
To Resolve Duplicate Content Issues
There are several common causes of duplicate content that may occur, including:
- Directories with and without a trailing slash.
- Default directory indexes.
- Uppercase letters in URLs.
- Site accessible on both http & https.
- Site accessible on www & non-www.
If you encounter these issues while testing your new site, you can redirect, rewrite, or delete certain URLs. If you have a very large site, you may want to look into working with an SEO company that has the expertise and manpower to fix these issues quickly and efficiently.
Push Your Site Live
Once you’ve built your site in BigCommerce and ensured your redirects are working properly, you still have to push your site live, including following these steps:
- Add domain to BigCommerce
- If you have purchased domain from third party, point it to BigCommerce using Name server or A Record.
- Make sure all the payment methods and shipping methods are set up.
- Make sure tax settings are set up correctly.
- Install and verify analytics code.
- Make a test purchase to make sure checkout process is working fine.
- Click the Launch button!
Once you have launched your store, it is not possible to set your store back to private, but each new page you add after the live launch are set as private by default before launch.
Monitoring Your Site After Going Live
While not ideal, if you changed the domain name for your site, the following steps need to be taken:
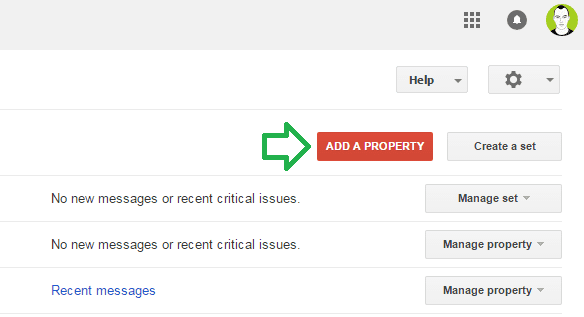
- Register and verify the old domain and new domain with Google Webmaster Tools.

- Submit the old sitemap through Google Webmaster Tools and Bing Webmaster Center.

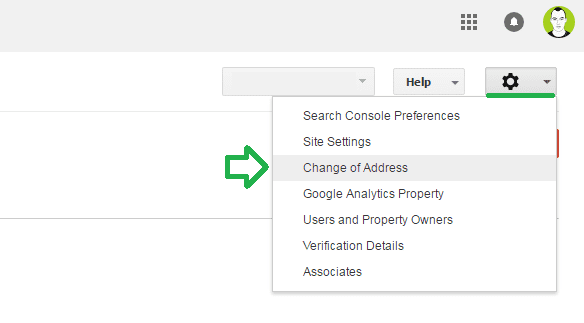
- Fill out the Change of Address form in Google Webmaster Tools.


- Wait until Google Webmaster Tools updates and fix any errors in the Diagnostics section.
- Monitor search engine results to make sure the new domain is being properly indexed.

Check the Redirect Strategy
Crawl all of the old site’s URLs from the redirect strategy through Screaming Frog to check that they’re all redirecting. Crawl all the new URLs that the old URLs are redirecting to and make sure they are all returning 200 OK responses.
Manual Checks
Look for problems including:
- Issues in Robots.txt.
- Meta robots noindex tags in the <head> section of the HTML source code.
- Meta robots nofollow tags in the source code.
- 302 redirects.
- Check Webmaster Tools for errors messages.
- Check XML sitemap for errors.
- Check HTML sitemap for similar errors.
- Missing or not properly migrated page titles.
- Missing or not properly migrated meta descriptions.
- Make sure that the 404 page returns a 404 server response.
- Make sure the analytics tracking code is present on all pages and is tracking correctly.
- Measure new site performance and compare it with that of the previous site.
Monitor Crawl Errors
Google Webmaster Tools and Bing Webmaster Tools both report crawl errors that should be checked frequently in the first days and weeks of your transition. Always try to figure out which errors are caused by the new site and which are caused by the legacy site.
Update Inbound Links
Inbound links can provide very valuable link juice to your site, so figure out which are the most valuable and try to contact the webmasters of those sites, requesting a URL update. Direct links pass more value than 301 redirects and this optional, time-consuming task will eventually pay off in higher ranking and site authority.
Eliminate Internal Linking Errors
Crawl the site and check the internal links for 3xx, 4xx, and 5xx category errors. Fix the internal links that have these issues.
Getting Backup
Since BigCommerce frequently sees sites transition to their platform from non-eCommerce sites, as well as other eCommerce platforms, they have an extensive guide, built-in tools, and third-party tools to make your transition easier. Combined with the tips provided here, your site will maintain much of its SEO value while you are migrating. While you may experience a slight dip in organic traffic, following these steps helps you overcome that drop quickly.